AWS Verify Email Address: The Complete SES Setup Guide 2026
A step-by-step guide to AWS verify email address workflows in Amazon SES — email vs domain identities, DNS records, sandbox limits, and how to stop bounces before you send.
TL;DR
- In Amazon SES, you can't send from any address until you complete an AWS verify email address step — you prove you own either a single email identity or an entire domain identity.
- Email address verification is fastest for testing; domain verification (DKIM CNAMEs + SPF + DMARC) is what you want for production sending.
- A brand-new SES account starts in the sandbox: you can only send to verified recipients until AWS grants production access.
- Verifying ownership in SES is not the same as confirming a recipient address is real and deliverable — that's a separate job for an email verifier.
- Clean your recipient list before you send so SES bounce and complaint rates stay low and your sending quota keeps growing.
What does "AWS verify email address" actually mean?#
When people search for "AWS verify email address," they usually mean one of two different things, and mixing them up causes most SES headaches.
The first meaning is identity verification: proving to Amazon SES that you own the address or domain you want to send from. AWS won't let you send a single message until you've done this, because it stops spammers from spoofing addresses they don't control.
The second meaning is recipient validation: checking whether an address you want to send to is real, active, and safe to email. SES does not do this for you. It will happily accept a send to a fake address and then record a hard bounce against your account — which is exactly what damages your sender reputation.
This guide covers both, because getting one right and ignoring the other is how teams end up throttled or suspended.

How do you verify a sender identity in Amazon SES?#
Amazon SES gives you two identity types. Pick based on how much you'll send and how professional the From address needs to look.
The two core paths:
- Email address identity — You verify one specific address (e.g.
you@company.com). AWS emails that address a confirmation link; you click it, and that single address becomes a verified sender. Fast, but it scales badly. - Domain identity — You verify the whole domain (e.g.
company.com) by adding DNS records. Once verified, you can send from any address on that domain (sales@,support@,noreply@) without verifying each one. - Easy DKIM — When you verify a domain, SES generates three CNAME records. Adding them enables DKIM signing, which is now effectively mandatory for inbox placement at Gmail and Yahoo.
- Custom MAIL FROM — Optional, but it aligns your SPF domain with your From domain, which strengthens DMARC alignment.
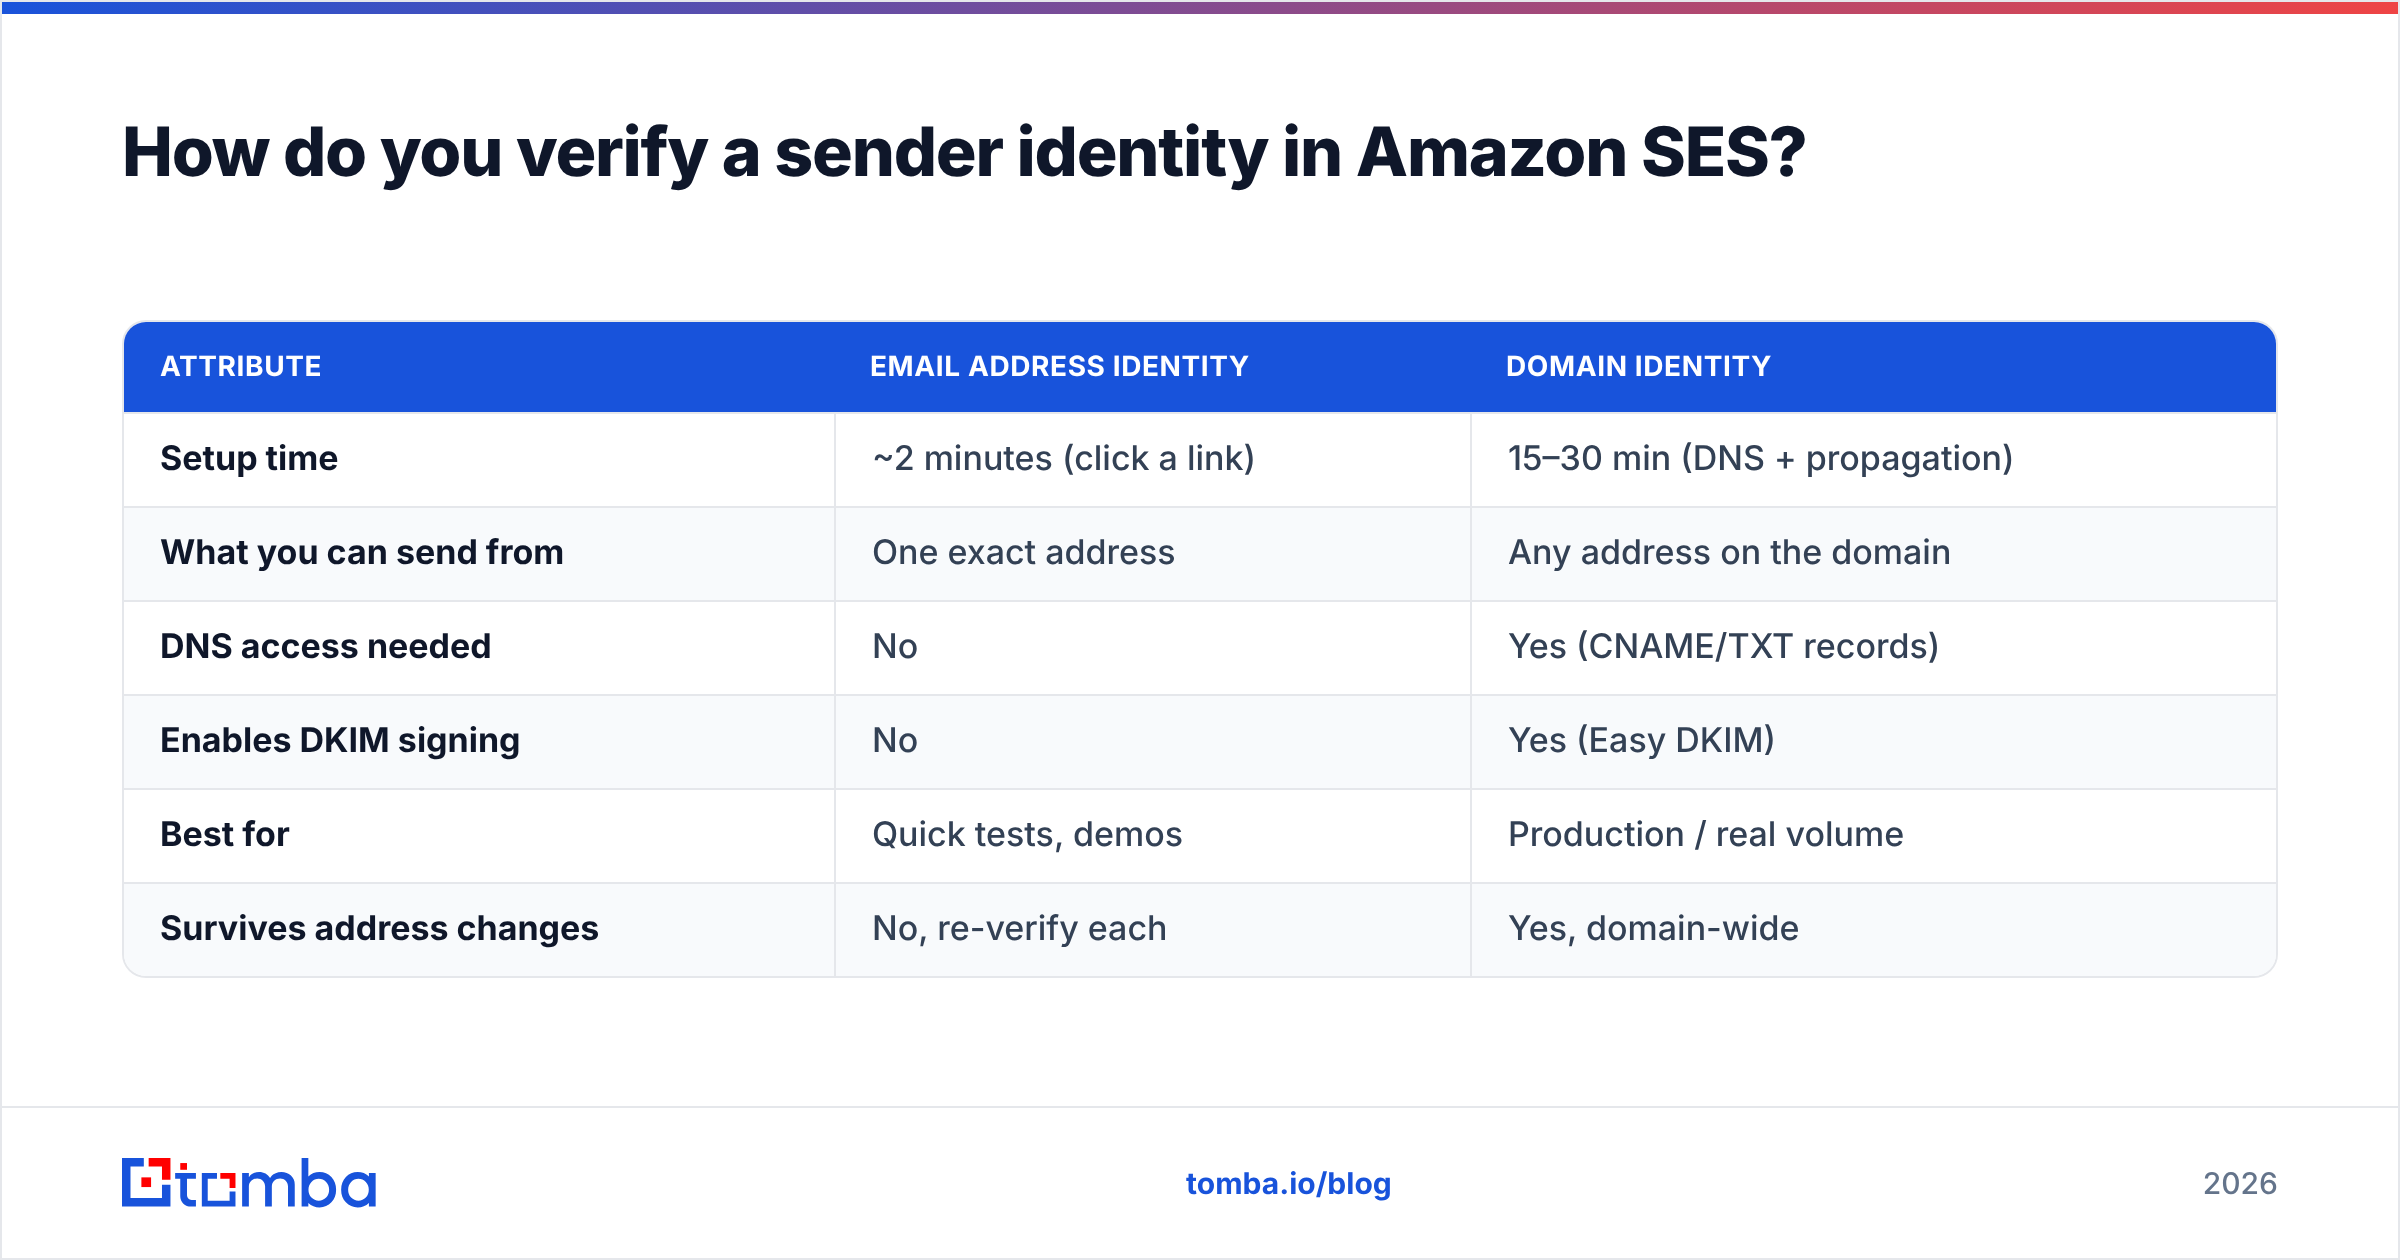
Here's how the two identity types stack up:
| Attribute | Email address identity | Domain identity |
|---|---|---|
| Setup time | ~2 minutes (click a link) | 15–30 min (DNS + propagation) |
| What you can send from | One exact address | Any address on the domain |
| DNS access needed | No | Yes (CNAME/TXT records) |
| Enables DKIM signing | No | Yes (Easy DKIM) |
| Best for | Quick tests, demos | Production / real volume |
| Survives address changes | No, re-verify each | Yes, domain-wide |
For anything beyond a quick test, verify the domain. It's the only path that gives you DKIM, flexible From addresses, and a setup that doesn't break the moment a teammate needs a new alias.
How do you verify an email address identity step by step?#
If you genuinely just need one address working for a test, the email-identity flow is the quickest route.
- Open the SES console and go to Configuration → Identities → Create identity.
- Choose "Email address" and type the address you control.
- Click Create identity. SES sends a verification email to that address within a minute or two.
- Open the inbox and click the link. The link is valid for 24 hours — if it expires, just resend from the console.
- Confirm the status flips to "Verified" in the Identities list. You can now use that address as a From/Source.
That's the entire AWS verify email address flow for a single sender. The catch: it only works for addresses whose inbox you can actually open. You can't verify ceo@bigcorp.com this way unless you can read that mailbox.
How do you verify a whole domain in SES?#
Domain verification is the production-grade option. You're adding DNS records that prove control of the domain and switch on authentication.
- Create identity → Domain in the SES console, and enter your domain.
- Leave Easy DKIM enabled (it's on by default). SES generates three
CNAMErecords. - Copy the records into your DNS provider (Route 53, Cloudflare, GoDaddy, etc.). If your domain is in Route 53, SES can add them for you automatically.
- Add an SPF record if you're using a custom MAIL FROM domain — typically a
TXTrecord includingamazonses.com. See AWS's official verification docs for the exact values. - Add a DMARC record (
_dmarc.company.comTXT) — start withp=noneto monitor, then tighten toquarantineorreject. - Wait for propagation. SES polls DNS and flips the identity to "Verified," usually within minutes but occasionally up to 72 hours.
Once the domain shows as verified with DKIM enabled, you're authenticated and ready to leave the sandbox. If you want to understand the underlying records, our glossary entries on the SPF record and email deliverability break them down in plain language.
What is the SES sandbox and why can't you send?#
Every new SES account is locked in the sandbox, and this trips up almost everyone on day one.
In the sandbox:
- You can only send to addresses you've also verified (so both sender and recipient must be verified).
- Your sending quota is tiny — roughly 200 messages per 24 hours at 1 message per second.
- It exists so AWS can confirm you're a legitimate sender before opening the floodgates.
To move to production access, you submit a request from the SES console (Account dashboard → Request production access). AWS asks how you handle bounces, complaints, and unsubscribes, and what your use case is. Answer honestly and specifically — vague requests get bounced back. Once approved, you can send to any recipient and your quota grows automatically as you maintain a healthy reputation.
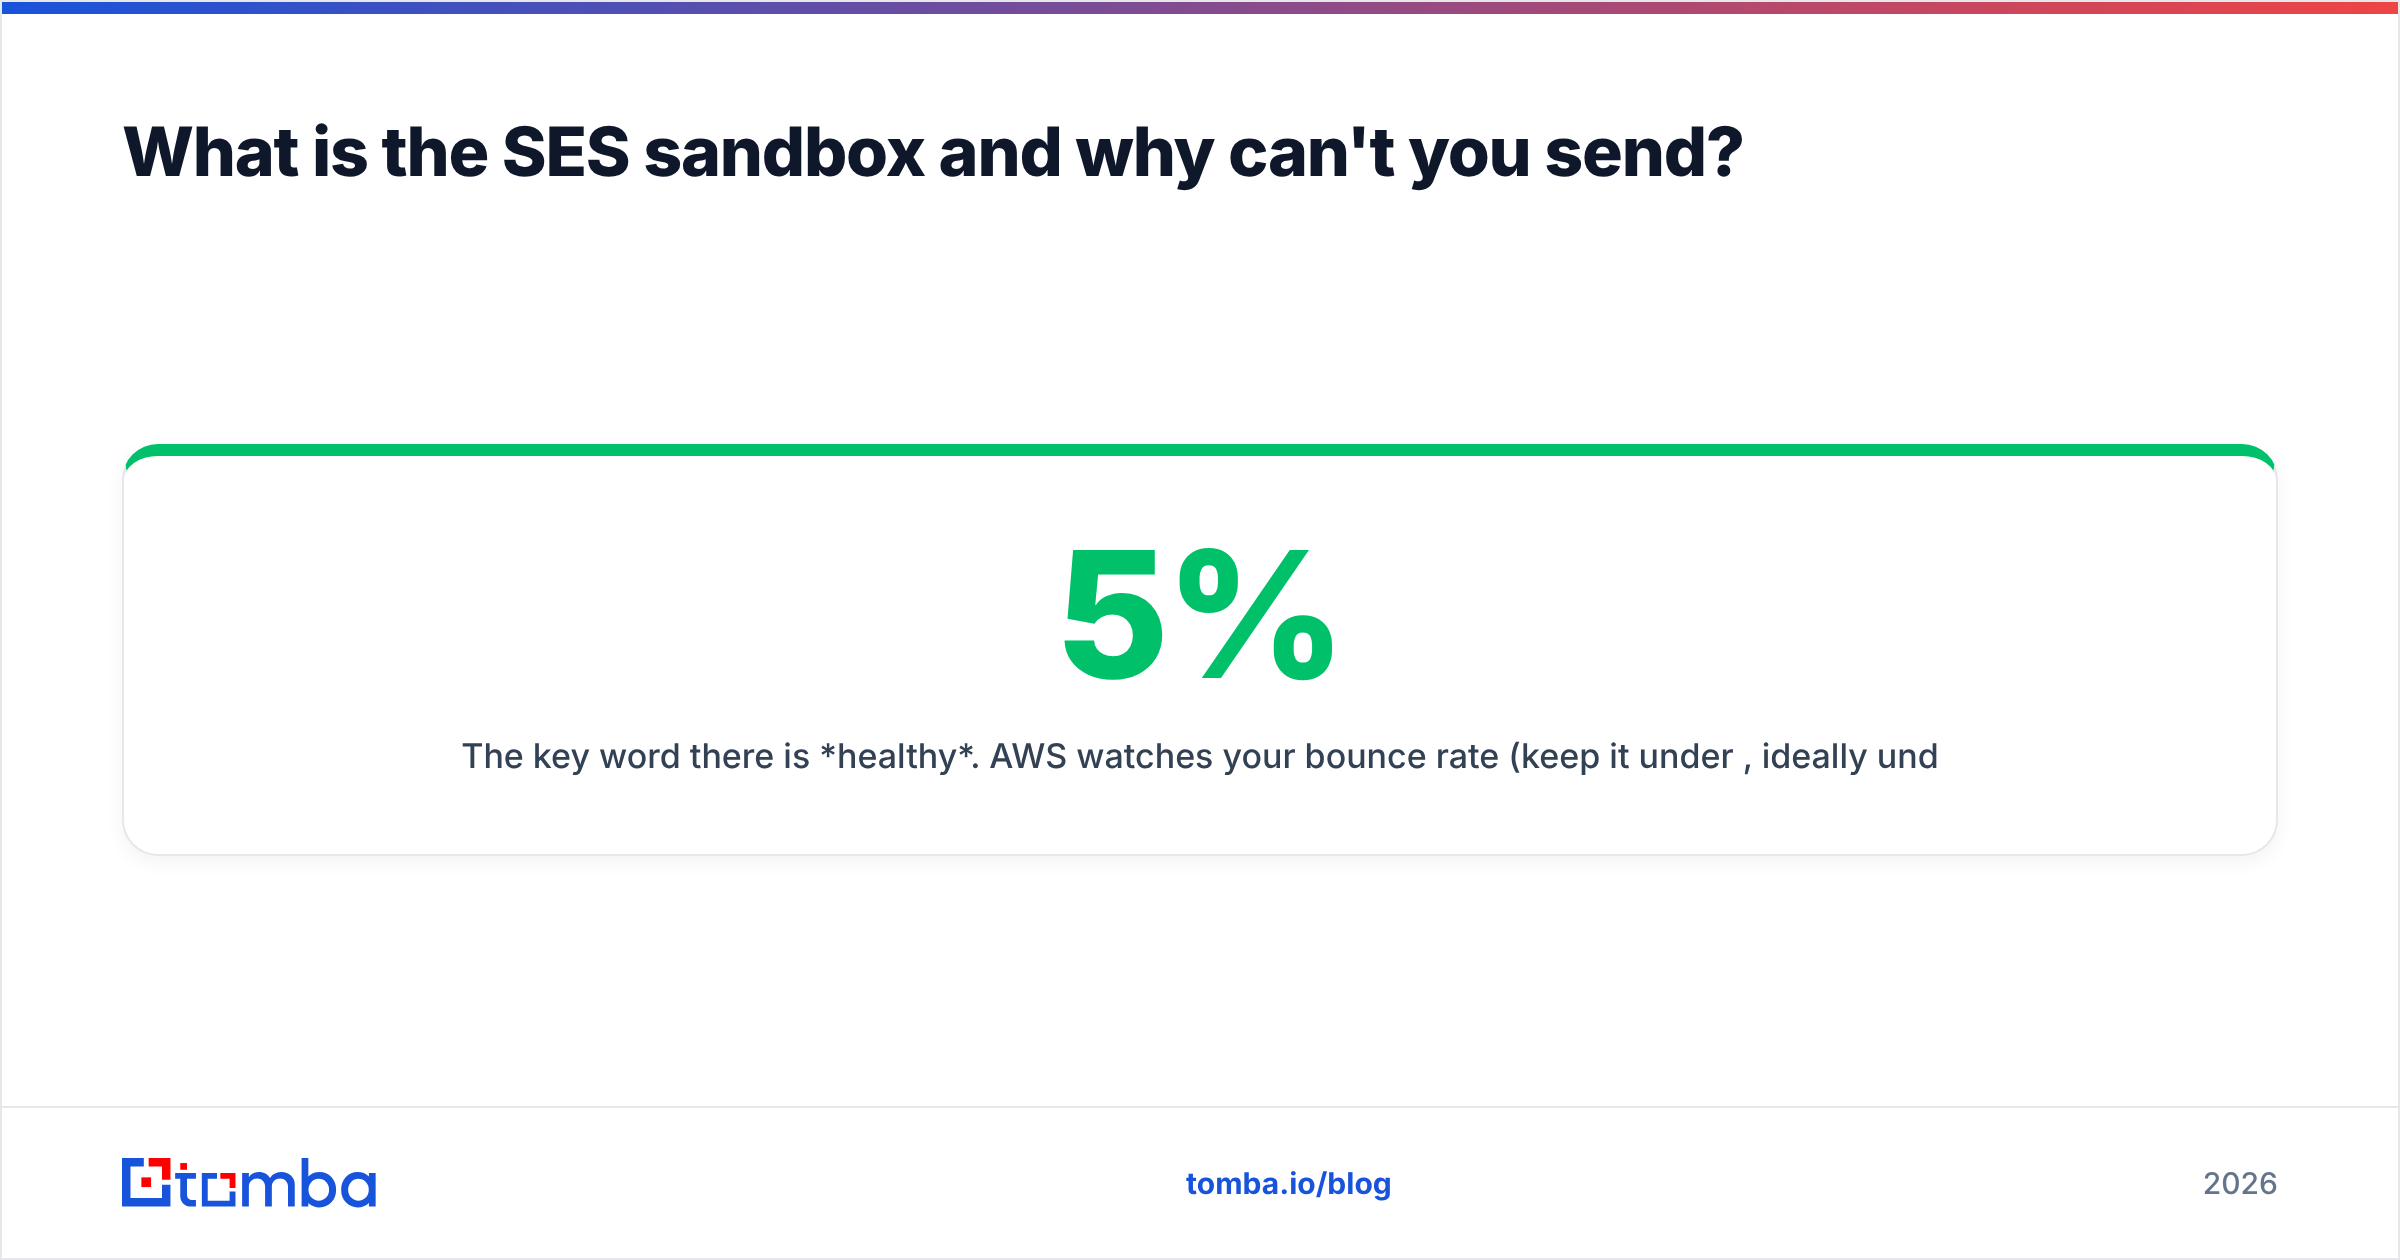
The key word there is healthy. AWS watches your bounce rate (keep it under 5%, ideally under 2%) and complaint rate (under 0.1%). Cross those thresholds and SES will throttle or pause you. Which leads directly to the part most tutorials skip.
Does verifying in SES mean the recipient address is valid?#
No — and this is the single most expensive misunderstanding in the whole topic.
SES identity verification only proves you own the sending address or domain. It tells you nothing about whether john.doe@prospect.com exists, is still active, or is a spam trap. When you upload a raw list and blast it through SES, every dead address becomes a hard bounce, and AWS counts those bounces against you.
Think of it like a delivery company. Verifying your SES identity is showing the courier your ID so they'll accept your packages. It does nothing to confirm the delivery addresses on those packages are real houses. Send 1,000 parcels to made-up streets and the courier will eventually stop trusting you.
This is where a dedicated email verification step belongs — before the data ever reaches SES.

How should you clean a list before sending through SES?#
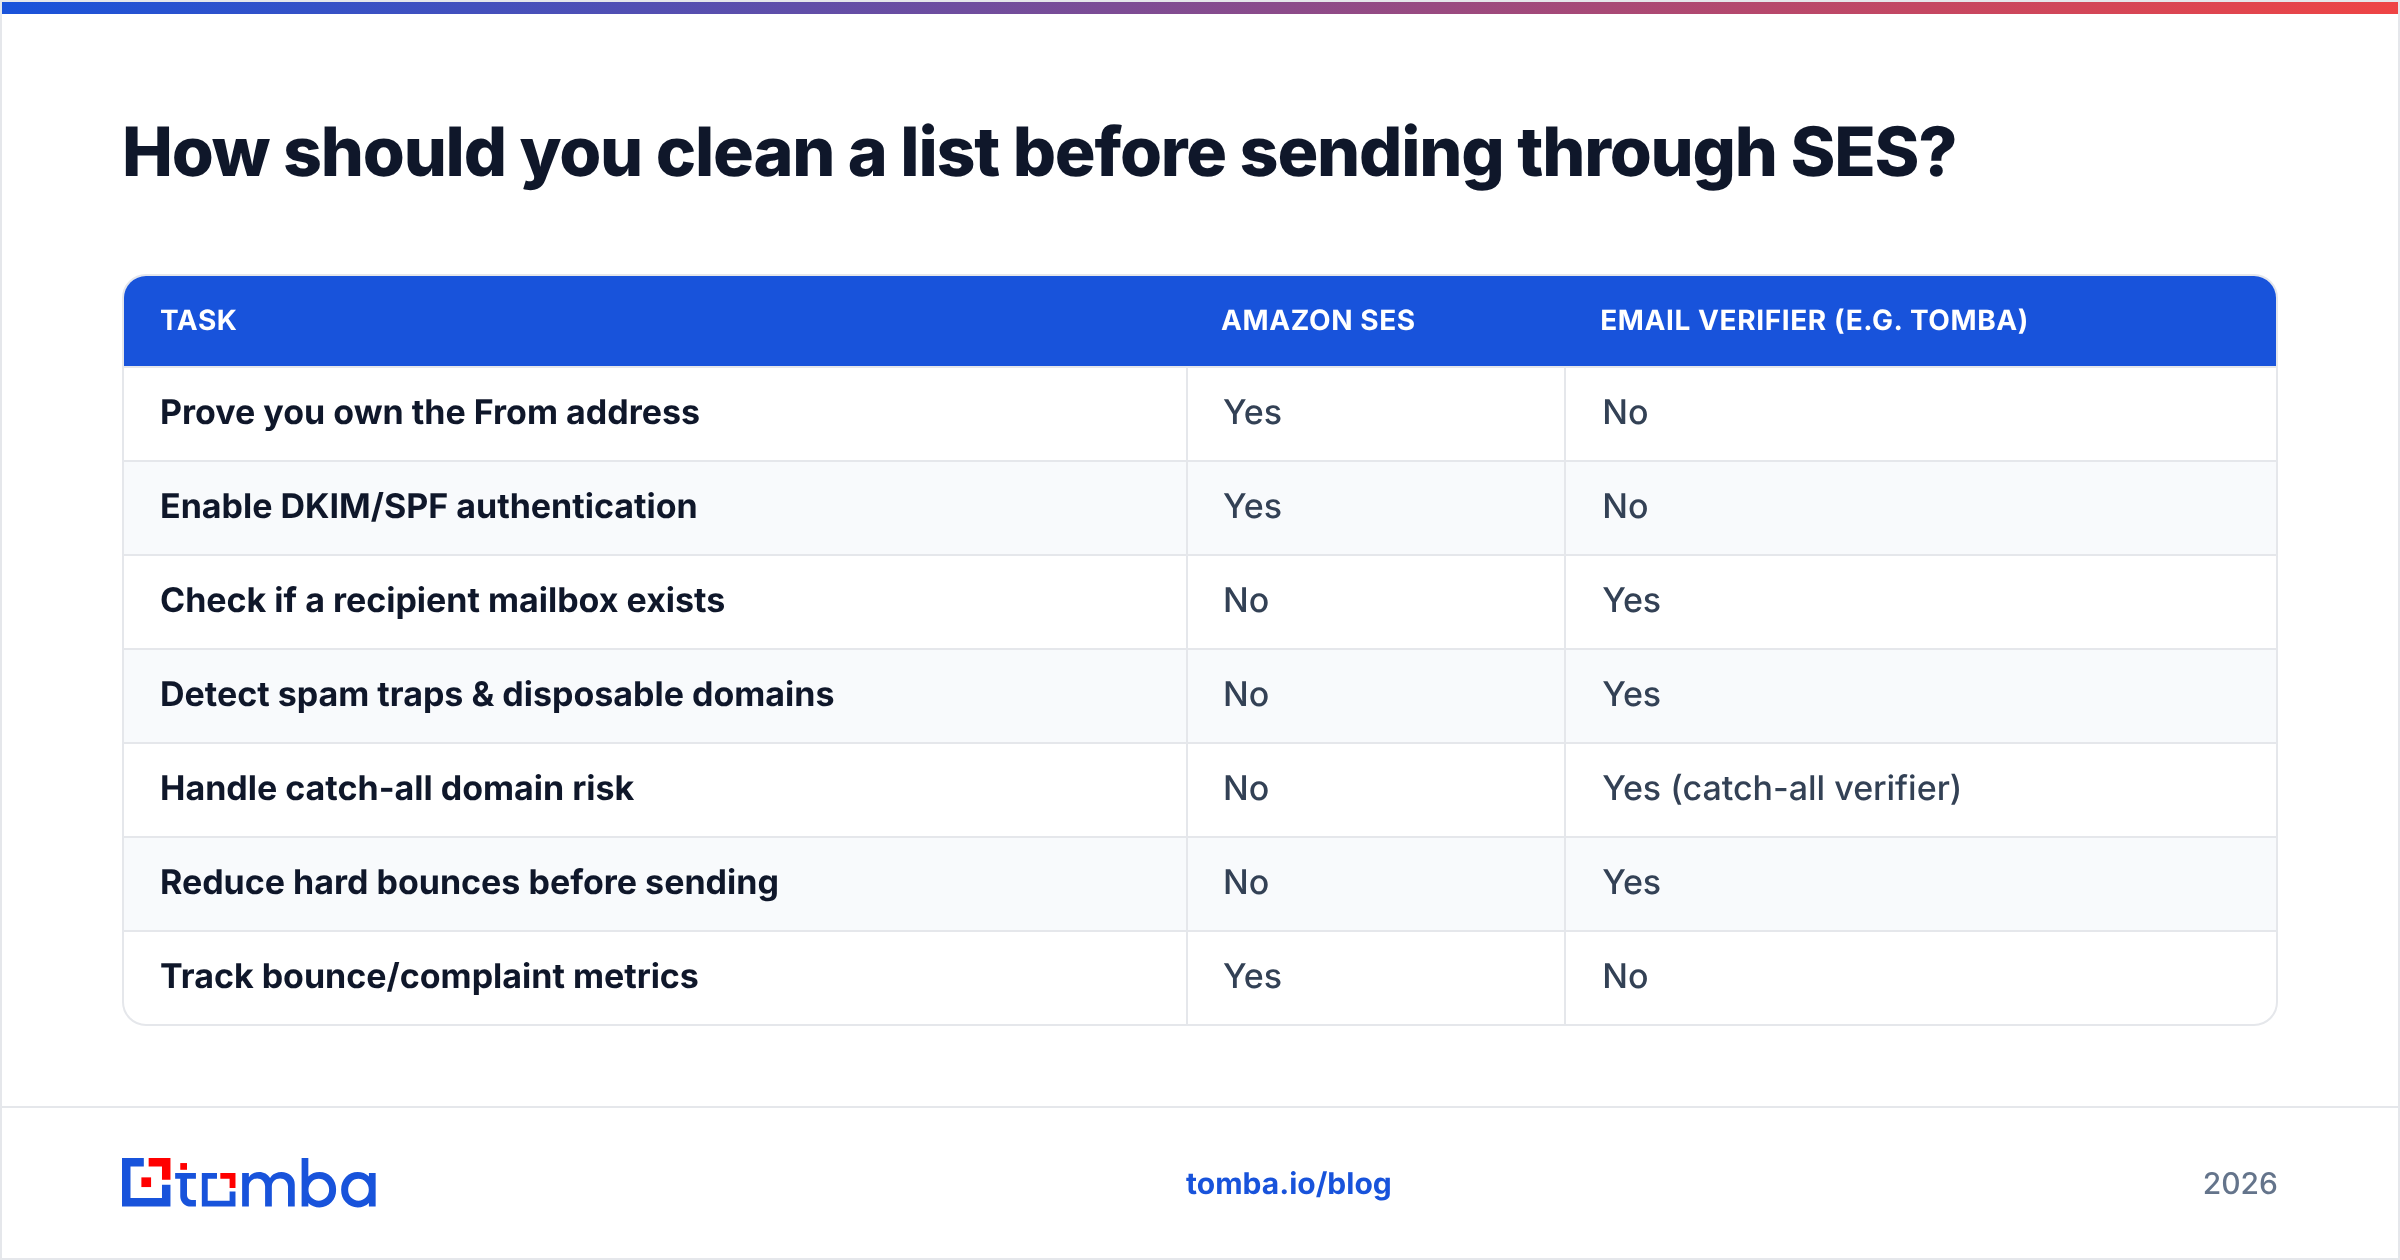
Run your recipient list through a verifier first, then hand only the clean, deliverable addresses to SES. Here's how the responsibilities split:
| Task | Amazon SES | Email verifier (e.g. Tomba) |
|---|---|---|
| Prove you own the From address | Yes | No |
| Enable DKIM/SPF authentication | Yes | No |
| Check if a recipient mailbox exists | No | Yes |
| Detect spam traps & disposable domains | No | Yes |
| Handle catch-all domain risk | No | Yes (catch-all verifier) |
| Reduce hard bounces before sending | No | Yes |
| Track bounce/complaint metrics | Yes | No |
A sensible pre-send workflow looks like this:
- Collect or find your addresses. If you're building lists from company domains, an email finder or domain search pulls verified-format addresses tied to real people.
- Bulk-verify the list. Run it through a bulk verify job to flag invalid, risky, and unknown addresses.
- Handle catch-all domains separately. Catch-all servers accept everything, so use a dedicated catch-all verifier to judge risk instead of trusting a blanket "accepted."
- Suppress the bad ones. Remove hard-invalids, keep deliverables, and decide per-campaign whether to risk "unknown" addresses.
- Send the clean list through SES. Now your bounce rate stays low and your quota keeps climbing.
Do this once and the difference in SES account health is dramatic. AWS rewards low bounce rates with higher quotas; a clean list is the cheapest reputation insurance you can buy.
What are the most common SES verification errors?#
A few failure modes show up again and again:
- "Email address is not verified" (MessageRejected). You're still in the sandbox and trying to send to an unverified recipient, or your From address isn't verified. Verify both, or request production access.
- Domain stuck on "Pending." Your DNS records are wrong, incomplete, or not yet propagated. Double-check the CNAME values exactly — a trailing-dot or copy/paste error is the usual culprit.
- DKIM not signing. All three CNAMEs must be present. Missing one silently disables DKIM, hurting inbox placement.
- High bounce rate warning email from AWS. You sent to unverified-quality data. Stop, clean the list, and email AWS describing your remediation.
- MAIL FROM in "Pending" / fallback. Your MX and SPF TXT records for the custom MAIL FROM subdomain are missing.
Most of these resolve in the DNS panel or by adding a verification step upstream. For sustained sending, monitor your metrics through SES's reputation dashboard and Amazon CloudWatch — and read AWS's Simple Email Service overview so you understand the quota mechanics before you scale volume.
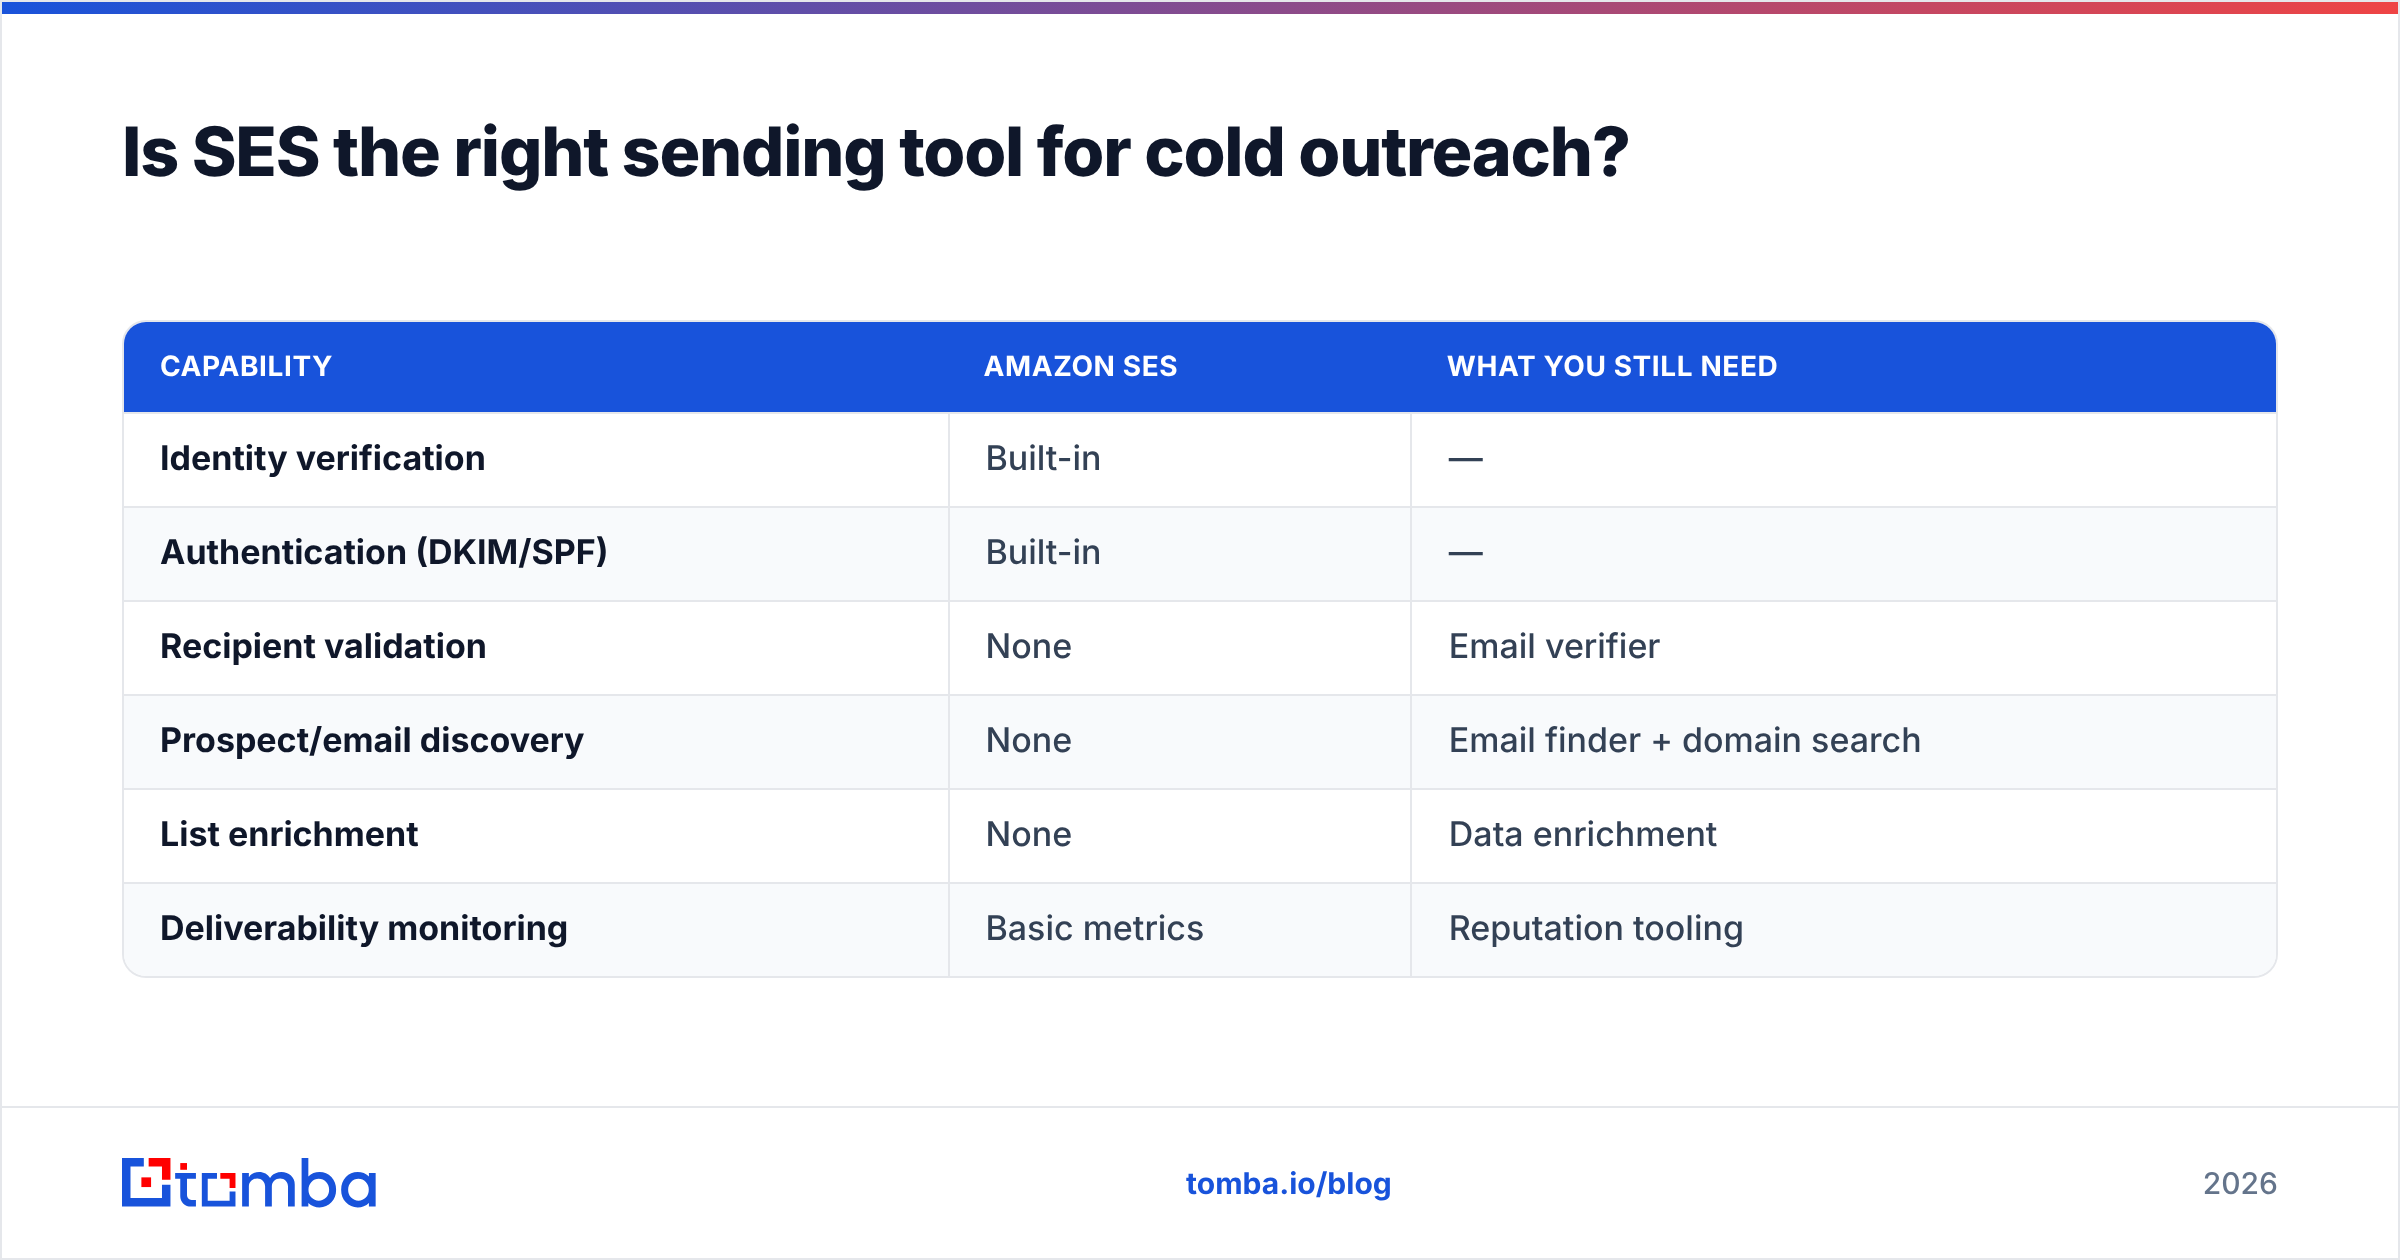
Is SES the right sending tool for cold outreach?#
SES is excellent for transactional and high-volume marketing mail when you own the data and manage reputation carefully. It's cheap, scalable, and reliable. But it's a raw sending engine, not a deliverability suite — it won't warm domains, validate prospects, or write your sequences.
So the honest answer: use SES for the sending infrastructure, and pair it with the right tooling for list quality and prospecting. The verification step in SES protects AWS from you; an email verifier protects your account from bad data. You need both.
| Capability | Amazon SES | What you still need |
|---|---|---|
| Identity verification | Built-in | — |
| Authentication (DKIM/SPF) | Built-in | — |
| Recipient validation | None | Email verifier |
| Prospect/email discovery | None | Email finder + domain search |
| List enrichment | None | Data enrichment |
| Deliverability monitoring | Basic metrics | Reputation tooling |
Final takeaway and next step#
To recap: AWS verify email address means proving you own a sending identity — fastest with a single email identity, best in production with a verified domain plus DKIM, SPF, and DMARC. Clear the sandbox by requesting production access, and keep your bounce rate low so your quota grows. But never confuse owning your sender with knowing your recipients are real.
The cleanest path to a healthy SES account is to validate every recipient before you hit send. Run your lists through the Tomba Email Finder to source accurate, real addresses by name, company, or domain — then verify them in bulk so SES only ever sees deliverable contacts. Start free with 25 searches a month, and check the full Tomba pricing when you're ready to scale. Fewer bounces, a stronger reputation, and an SES account that keeps raising your limits instead of throttling them.
// get started
Find, verify and enrich your first contacts today
Start on the free plan with 25 searches a month, then scale when your team is ready.
Free plan · No credit card required · GDPR & CCPA
// about the author