How to Set Up Cloudflare DKIM in 2026: A Complete Guide
DKIM signing tells inbox providers your mail is really yours. Here's how to configure Cloudflare DKIM the right way in 2026 — records, selectors, testing, and the mistakes that quietly kill deliverability.
DKIM is the difference between "this email is really from you" and "this might be a spoof — send it to spam." If you run your DNS on Cloudflare, you already have everything you need to get DKIM right. Most people just add one record, never test it, and wonder why their open rates crater.
This guide walks through Cloudflare DKIM end to end: what it does, the exact DNS records to add, how selectors work, how to test the signature, and the specific mistakes that silently break authentication.
TL;DR#
- DKIM proves your mail wasn't tampered with by attaching a cryptographic signature that receivers verify against a public key stored in your Cloudflare DNS.
- You publish DKIM as a TXT (or CNAME) record at
selector._domainkey.yourdomain.com— your email provider gives you the value. - Cloudflare's proxy does not touch DKIM. Set the DKIM record to "DNS only" (grey cloud); proxying it breaks resolution.
- DKIM alone is not enough — pair it with SPF and DMARC, or Gmail and Yahoo bulk-sender rules will still throttle you.
- Always test before you send at volume. A single wrong character in the public key makes every message fail authentication.
What is Cloudflare DKIM?#
DKIM (DomainKeys Identified Mail) is like a wax seal on a letter. The sender stamps each message with a private key only they hold; the receiver checks the seal against a public key you've published for anyone to read. If the seal matches, the message is authentic and unmodified in transit. If it's broken or missing, the receiver gets suspicious.
"Cloudflare DKIM" isn't a separate product — it means hosting that public key in your Cloudflare DNS. Cloudflare is one of the most widely used authoritative DNS providers, so if your nameservers point to Cloudflare, that's where your DKIM record lives. The signing itself happens at your email provider (Google Workspace, Microsoft 365, Amazon SES, your cold-email tool). Cloudflare's only job is to serve the public key reliably when a receiving server asks for it.
That division of labor matters: your provider generates the key pair, keeps the private half, and hands you the public half to paste into Cloudflare. Get that paste wrong and nothing signs correctly, no matter how healthy your sending infrastructure is.
How does DKIM actually work?#
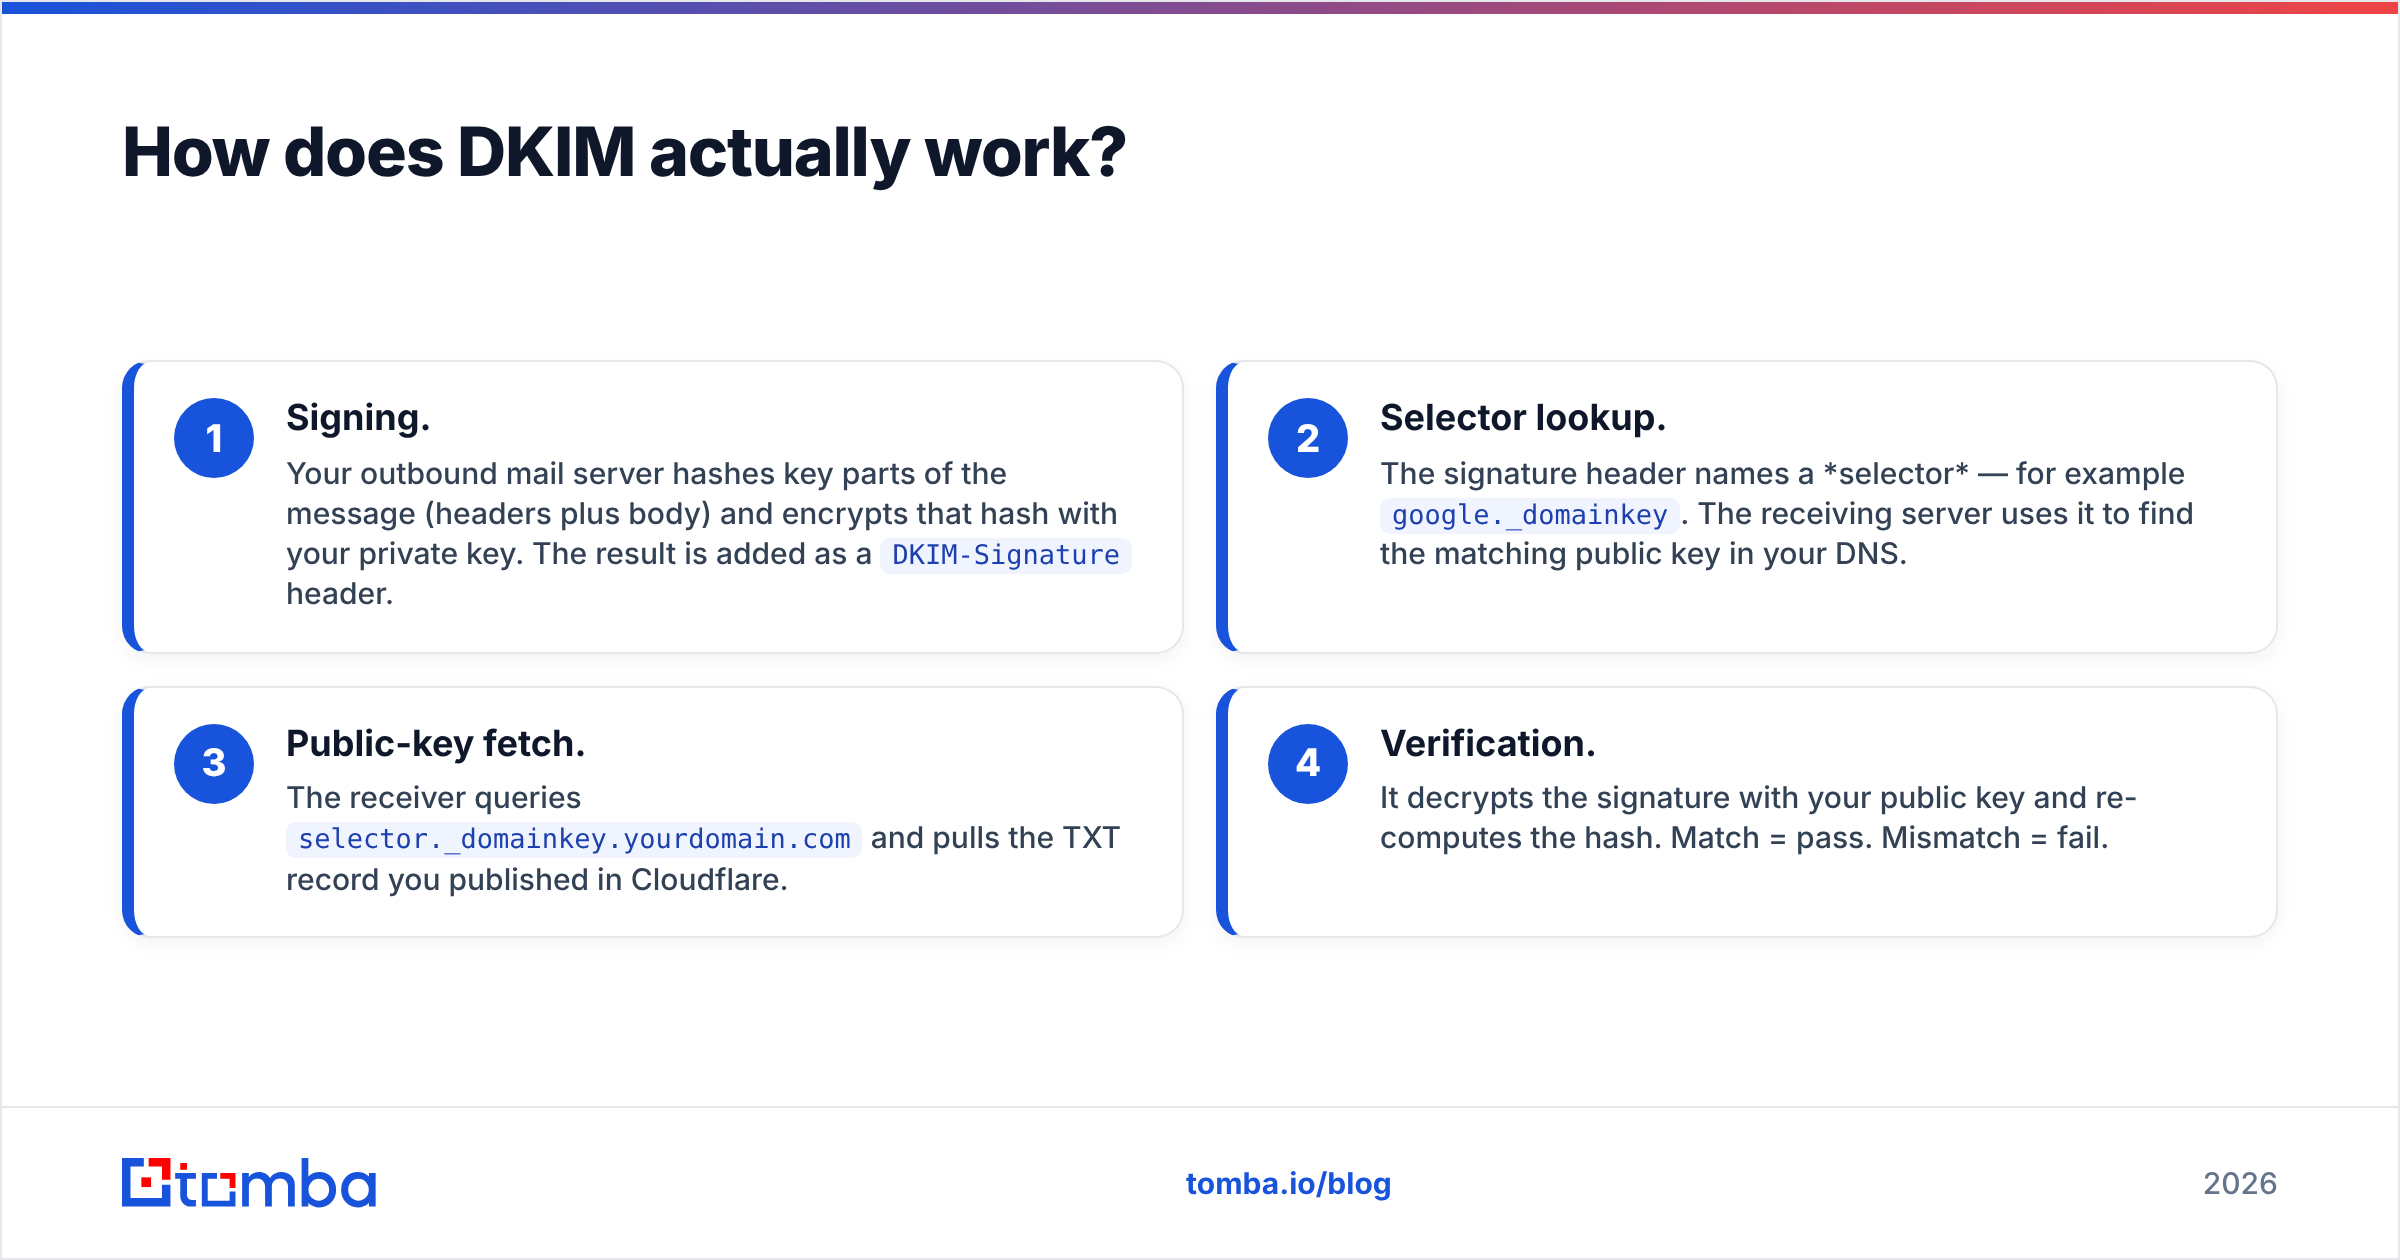
Four steps happen every time you send an authenticated message:
- Signing. Your outbound mail server hashes key parts of the message (headers plus body) and encrypts that hash with your private key. The result is added as a
DKIM-Signatureheader. - Selector lookup. The signature header names a selector — for example
google._domainkey. The receiving server uses it to find the matching public key in your DNS. - Public-key fetch. The receiver queries
selector._domainkey.yourdomain.comand pulls the TXT record you published in Cloudflare. - Verification. It decrypts the signature with your public key and re-computes the hash. Match = pass. Mismatch = fail.
Because the private key never leaves your provider, a spammer can't forge a valid signature for your domain. That's the entire security value. And because the check covers the message body, DKIM also catches tampering — if a middlebox rewrites your content, the hash won't match and the signature fails.
If you want the deeper mechanics, the official Cloudflare DKIM documentation covers record formats, and the term itself is worth bookmarking in the email deliverability glossary.
What DKIM record do you add in Cloudflare?#
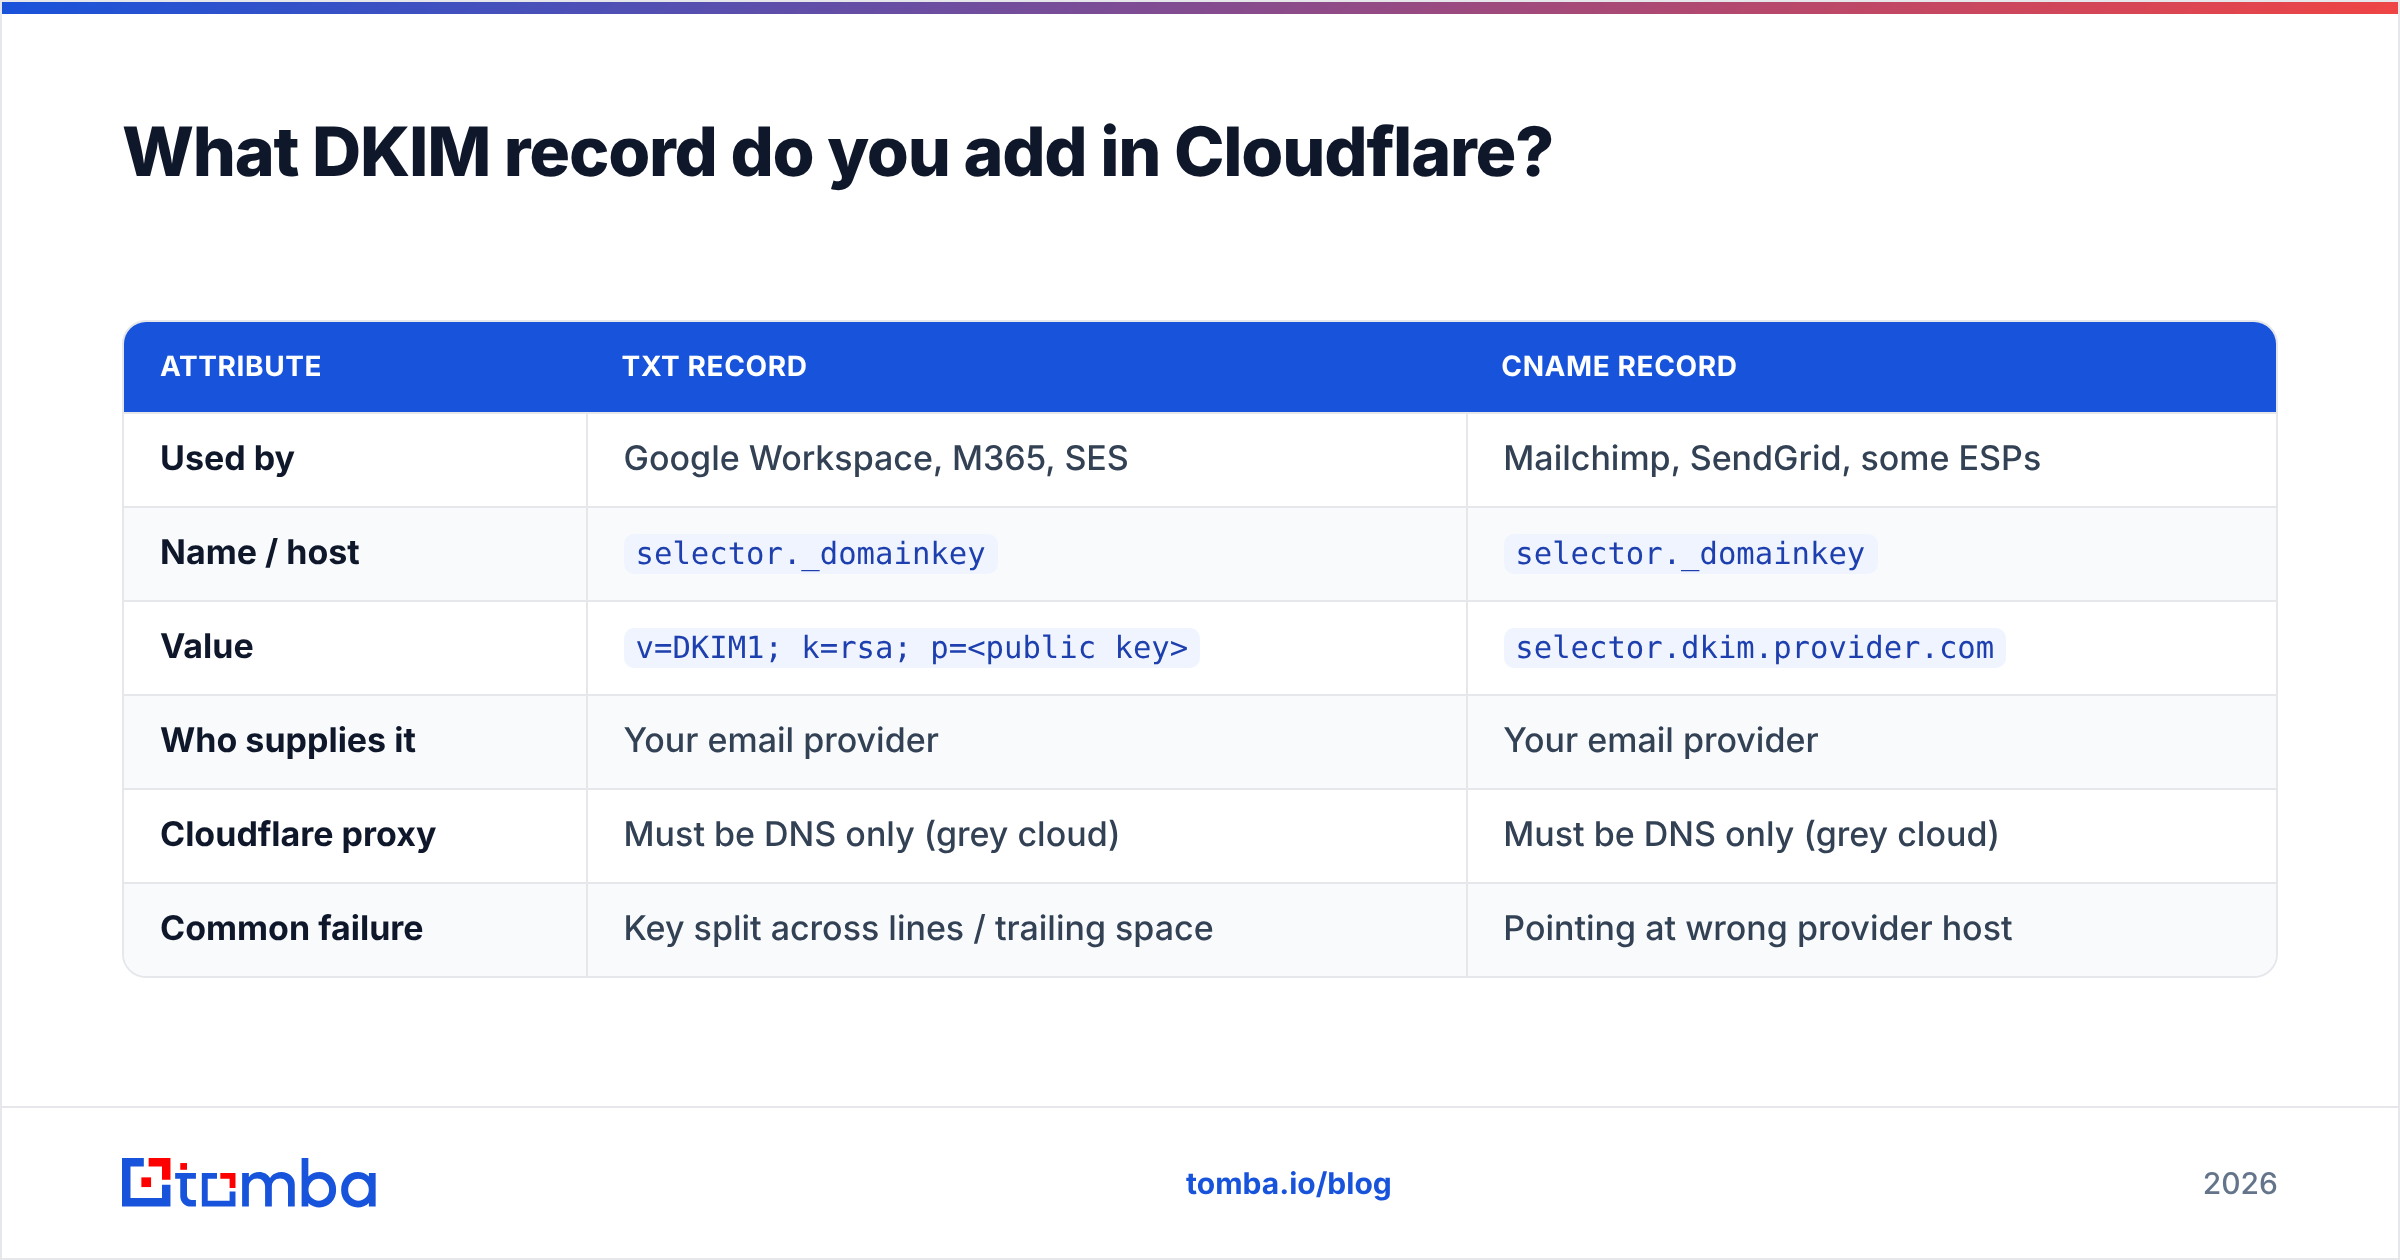
A DKIM record is a DNS entry at a subdomain built from your selector. Two formats exist depending on your provider:
| Attribute | TXT record | CNAME record |
|---|---|---|
| Used by | Google Workspace, M365, SES | Mailchimp, SendGrid, some ESPs |
| Name / host | selector._domainkey |
selector._domainkey |
| Value | v=DKIM1; k=rsa; p=<public key> |
selector.dkim.provider.com |
| Who supplies it | Your email provider | Your email provider |
| Cloudflare proxy | Must be DNS only (grey cloud) | Must be DNS only (grey cloud) |
| Common failure | Key split across lines / trailing space | Pointing at wrong provider host |
The steps in the Cloudflare dashboard:
- Open your domain, go to DNS → Records.
- Click Add record. Choose TXT (or CNAME if your provider uses one).
- In Name, enter only the selector portion — e.g.
google._domainkey. Cloudflare appends your root domain automatically. Do not type the fullgoogle._domainkey.yourdomain.com, or you'll create a doubled-up record. - In Content, paste the exact value your provider gave you.
- Leave TTL on Auto and save.
For CNAME-style DKIM, Cloudflare shows an orange-cloud toggle. Turn it off — a proxied CNAME won't resolve to the provider's key host.

How do DKIM selectors work?#
A selector is a label that lets you run multiple DKIM keys on the same domain at once. Think of it like numbered keys on a hotel keyring — each opens a different door, but they all belong to the same building (your domain).
You'll see selectors like google, selector1, s1, k1, or mail. Each email service picks its own. This is why a domain can send through Google Workspace and a cold-email platform and a transactional provider simultaneously — each publishes its own selector._domainkey record and signs with its own key. They never collide.
Selectors also make key rotation painless. When you rotate keys, your provider publishes a new selector (say selector2) alongside the old one, starts signing with the new key, then retires the old record days later. No downtime, no failed authentication window. If you're running multiple sending tools, keep a simple map of which selector belongs to which service so you never delete a live one by mistake.
Is DKIM alone enough for deliverability?#
No — and this is where most senders get burned. DKIM is one leg of a three-legged stool:
- SPF says which servers are allowed to send for your domain. Check yours with an SPF checker before you touch DKIM.
- DKIM says this specific message is authentic and unaltered.
- DMARC ties them together and tells receivers what to do when a message fails — nothing, quarantine, or reject.
Since Google and Yahoo's 2024 bulk-sender requirements (still enforced and tightened in 2026), anyone sending over ~5,000 messages a day to Gmail must have all three aligned, plus one-click unsubscribe and a spam-complaint rate under 0.3%. DKIM without DMARC leaves you exposed; DMARC without a passing DKIM or SPF alignment does nothing. You can read the current thresholds straight from Google's sender guidelines.
There's a reputation layer on top of all this. Authentication gets you considered; your sender reputation decides whether you land in the inbox. Clean lists, low bounces, and real engagement are what build it — which is why verifying addresses before you send is not optional.
How do you test Cloudflare DKIM?#
Never assume a pasted record is correct. Verify it three ways:
- DNS lookup. From a terminal, run
dig TXT google._domainkey.yourdomain.com +short(swap in your selector). You should see thev=DKIM1; k=rsa; p=...value returned as one clean string. If it comes back empty, the record name is wrong or Cloudflare is still propagating (usually seconds, occasionally a few minutes). - Send-and-check. Email a message to a Gmail account, open it, click the three-dot menu → Show original. Look for
DKIM: 'PASS' with domain yourdomain.com. Gmail also shows SPF and DMARC results on the same screen. - Signature validators. Send to a mailbox tester or use your provider's built-in DKIM check. Most will flag a broken key immediately.
Common failures and fixes:
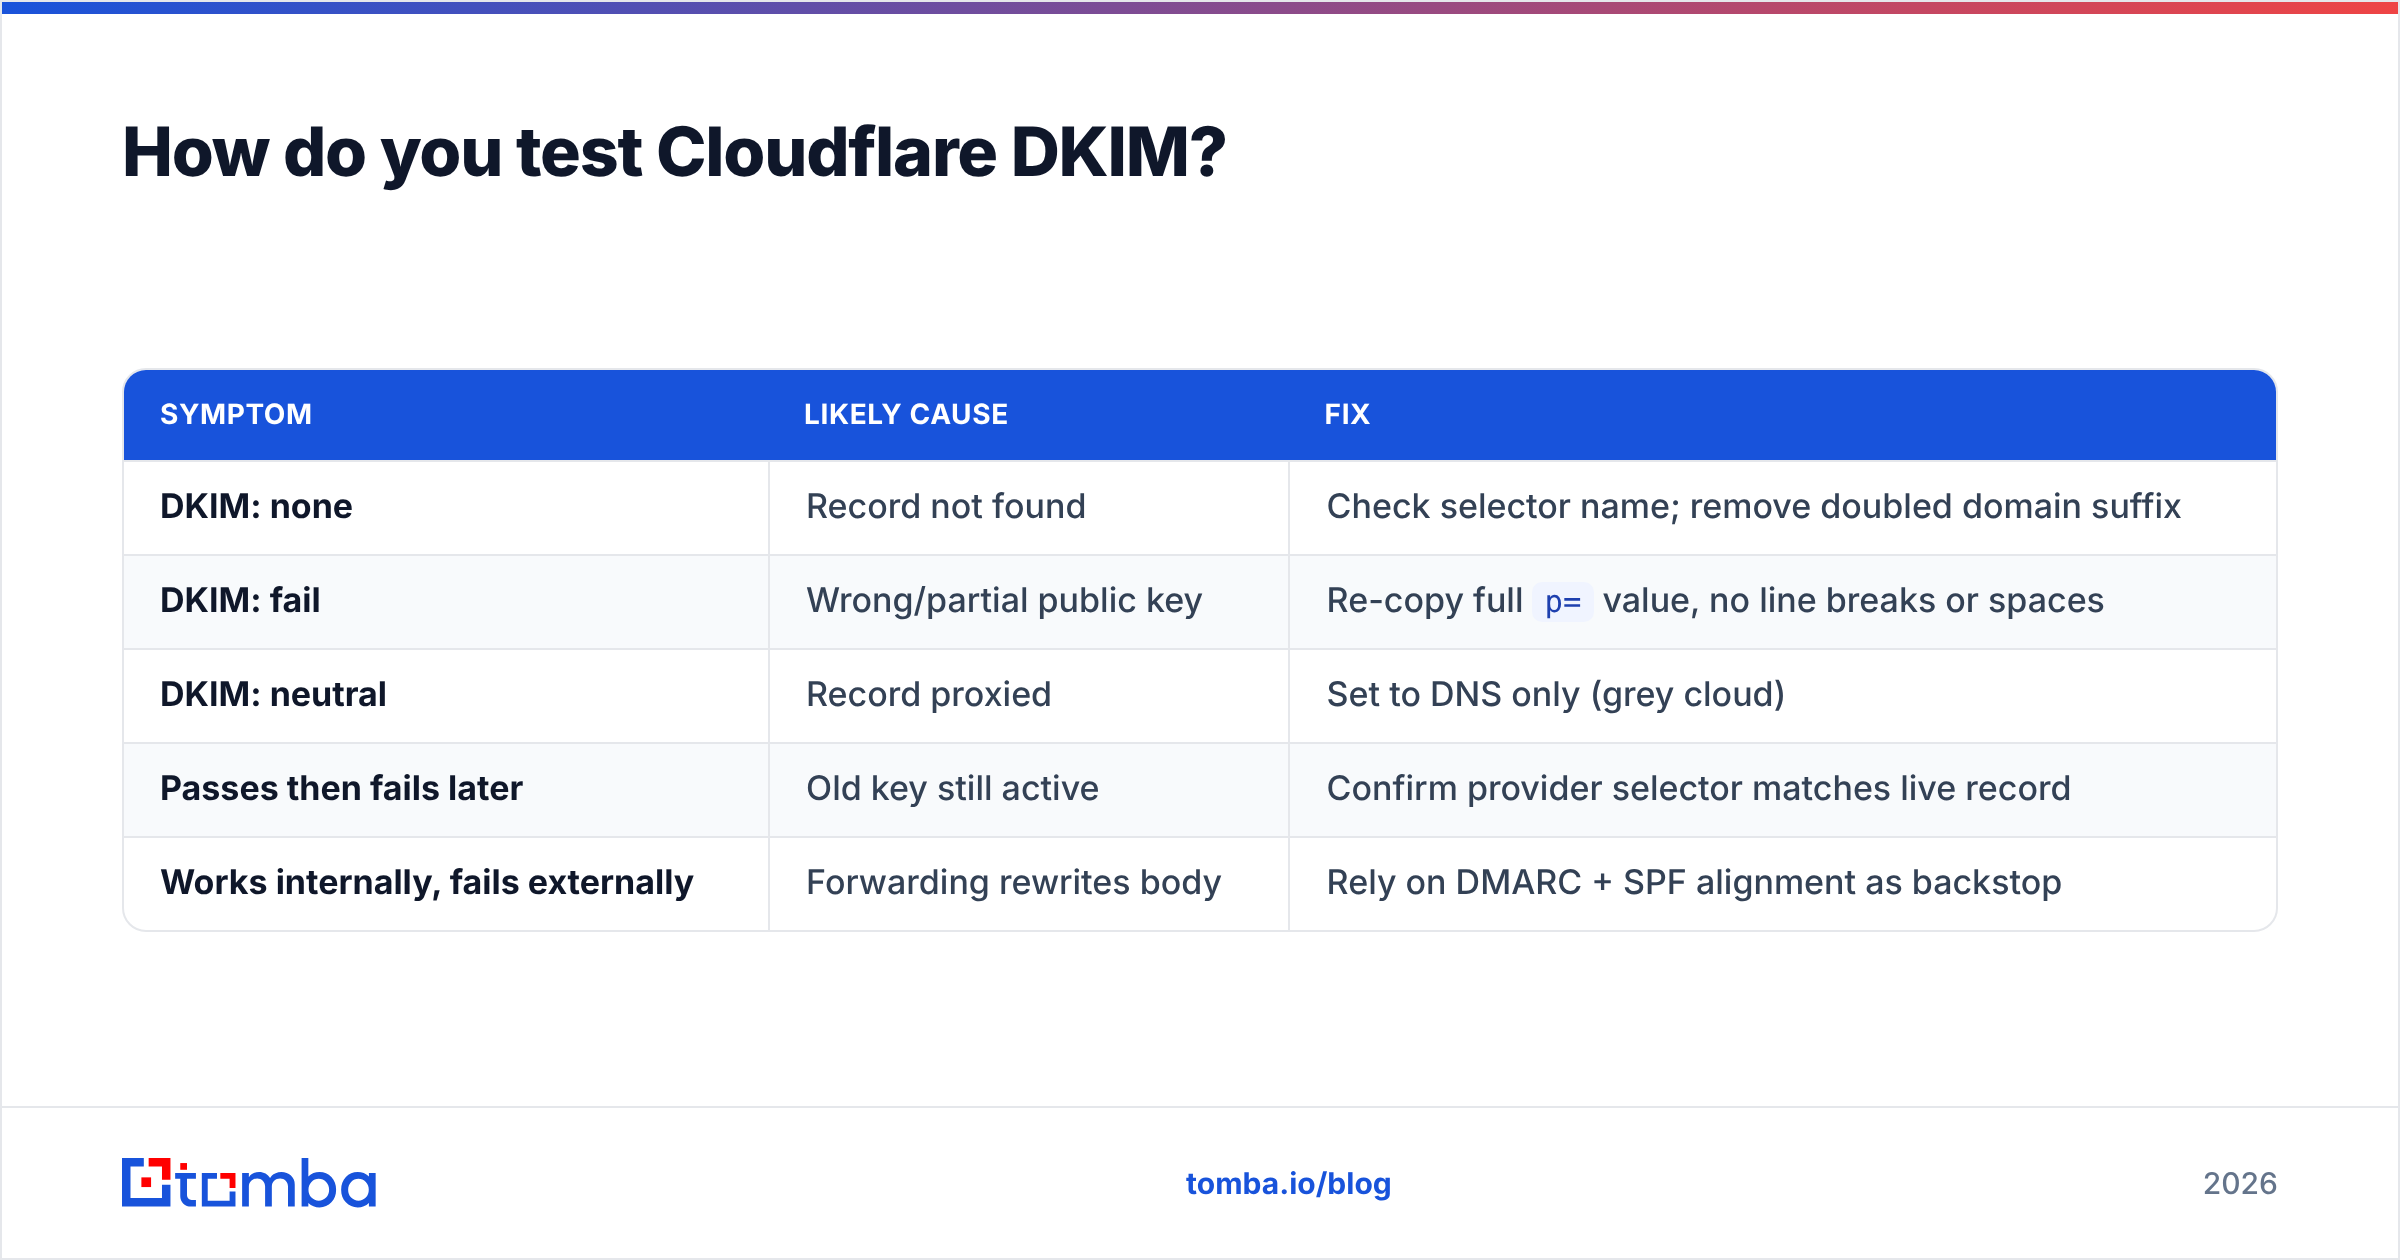
| Symptom | Likely cause | Fix |
|---|---|---|
| DKIM: none | Record not found | Check selector name; remove doubled domain suffix |
| DKIM: fail | Wrong/partial public key | Re-copy full p= value, no line breaks or spaces |
| DKIM: neutral | Record proxied | Set to DNS only (grey cloud) |
| Passes then fails later | Old key still active | Confirm provider selector matches live record |
| Works internally, fails externally | Forwarding rewrites body | Rely on DMARC + SPF alignment as backstop |
The number-one Cloudflare-specific gotcha: pasting a long RSA key that Cloudflare (or your clipboard) split across lines. The p= value must be a single continuous string. If verification fails and everything else looks right, delete the record and re-paste in one clean line.
How is DKIM different from a catch-all or verification problem?#
Authentication and list hygiene solve different problems, and people conflate them. DKIM makes sure the messages you send are trusted. It does nothing about who you're sending to. You can have a flawless DKIM setup and still tank your reputation by blasting a list full of dead addresses and spam traps.
That's the other half of deliverability. Before a campaign, run addresses through an email verifier to strip bounces, and use a catch-all verifier to gauge risky domains that accept everything. High bounce rates signal spam-like behavior to receivers regardless of how clean your authentication is — a hard-bounce spike can undo weeks of good sending.
So the mental model is: DKIM = trust your mail. Verification = trust your list. You need both. One proves the letter is sealed; the other proves the mailbox exists.
What's the right setup order?#
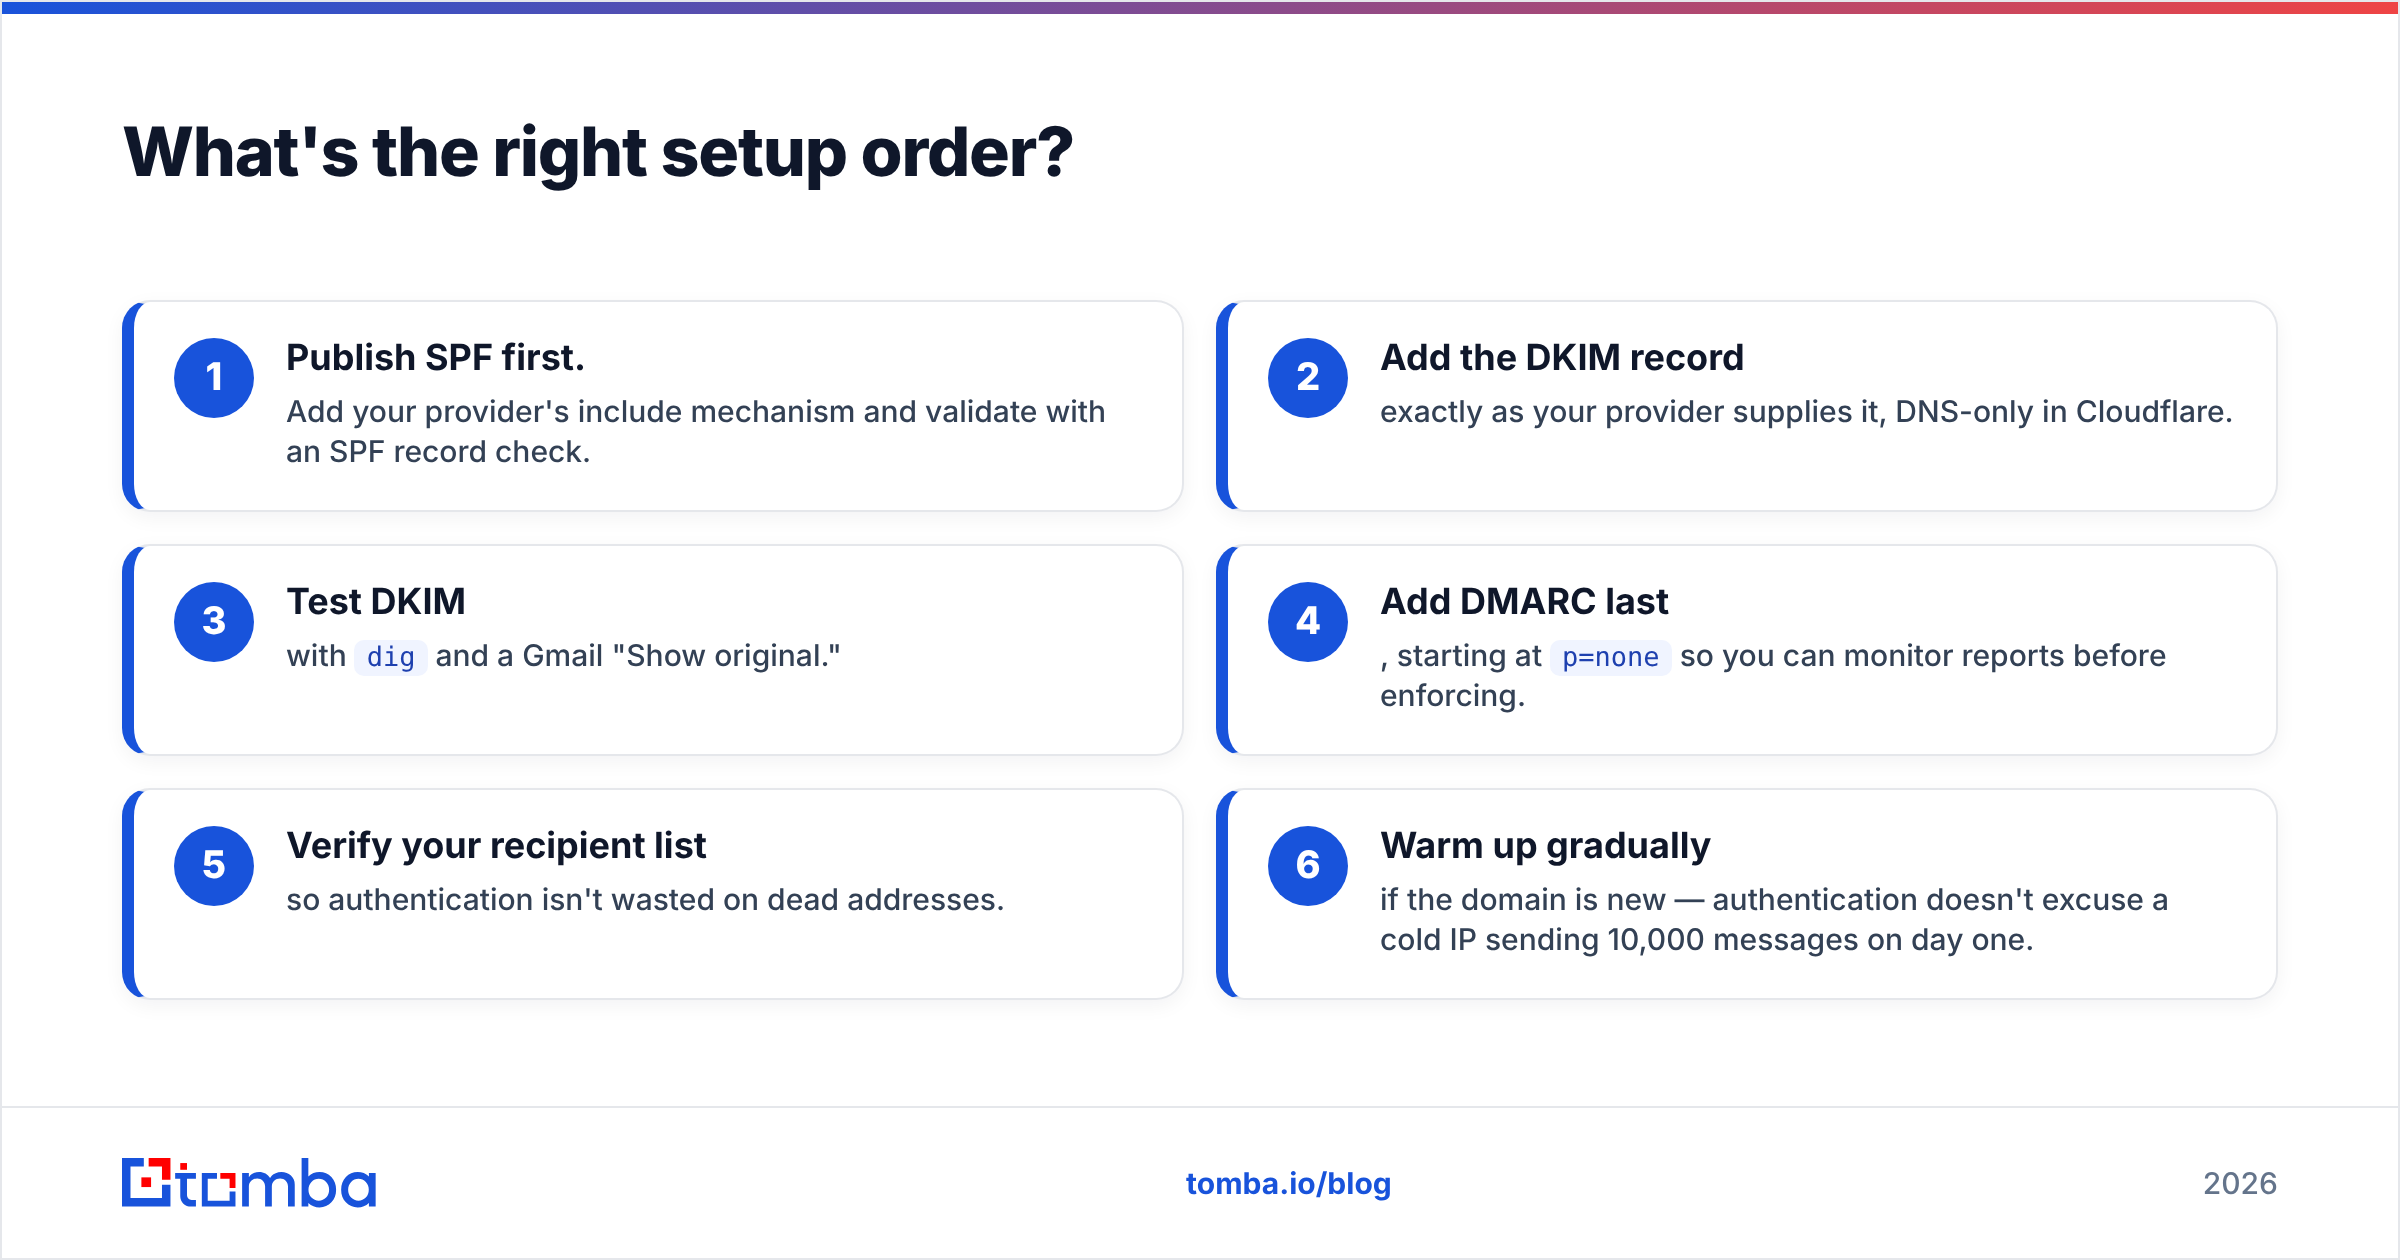
Do it in this sequence to avoid chasing phantom failures:
- Publish SPF first. Add your provider's include mechanism and validate with an SPF record check.
- Add the DKIM record exactly as your provider supplies it, DNS-only in Cloudflare.
- Test DKIM with
digand a Gmail "Show original." - Add DMARC last, starting at
p=noneso you can monitor reports before enforcing. - Verify your recipient list so authentication isn't wasted on dead addresses.
- Warm up gradually if the domain is new — authentication doesn't excuse a cold IP sending 10,000 messages on day one.
Move DMARC to p=quarantine then p=reject only after a week or two of clean aggregate reports. Jumping straight to reject with a misconfigured DKIM will bounce your own legitimate mail.
Frequently asked questions#
Does Cloudflare's proxy break DKIM? Only if you proxy the DKIM record itself. The orange cloud is for web traffic (A/AAAA/CNAME to your site). DKIM records must stay grey-cloud "DNS only" so receiving servers read the real key value.
How long until a new DKIM record works? Cloudflare propagates authoritative records in seconds to a few minutes. If a lookup fails after 15 minutes, the record itself is wrong — recheck the name and value rather than waiting longer.
Can I have more than one DKIM record?
Yes. Each sending service uses its own selector, so multiple selector._domainkey records coexist without conflict. That's the entire point of selectors.
Should I use a 2048-bit key? Prefer 2048-bit over 1024-bit where your provider offers it — it's stronger and now standard. If Cloudflare complains a single TXT string is too long, your provider will supply a split-string format that Cloudflare accepts.
Does DKIM guarantee inbox placement? No. It's a trust signal, not a delivery guarantee. Reputation, list quality, engagement, and complaint rate still decide placement. Authentication is the entry ticket, not the seat.
Get your list inbox-ready before you turn on DKIM#
DKIM keeps your mail authenticated — but authentication only pays off when you're sending to real people. The fastest way to protect the reputation you're building is to stop emailing addresses that don't exist.
Tomba's Email Finder sources verified professional addresses by name, company, or domain, and its built-in verification flags the dead and risky ones before they ever hit send. Start on the free tier (25 searches a month) and scale to Starter at $49/mo or Growth at $99/mo as your outbound grows — see full Tomba pricing for the breakdown. Pair a clean, verified list with a correct Cloudflare DKIM setup, and you've covered both halves of deliverability: trusted mail, sent to trusted contacts.
Related guides#
// get started
Find, verify and enrich your first contacts today
Start on the free plan with 25 searches a month, then scale when your team is ready.
Free plan · No credit card required · GDPR & CCPA
// about the author